

Yes, you need to set up your e-mail address on your iPhone but don't worry, you won't have to put your geek hat on. Lol – that's for us!
Here are the directions (including screenshots):
Note 1 (below):
If this is your first time setting up your e-mail, you will need the e-mail address and password that was sent from BazingaWeb.com.
General Setup
Open Settings.

Tap Mail.
Tap Accounts.
Note: For older iOS versions, you will instead tap Add Account> Other > Add Mail Account. Then, skip to Step 6.Tap Add Account.
Choose Other.
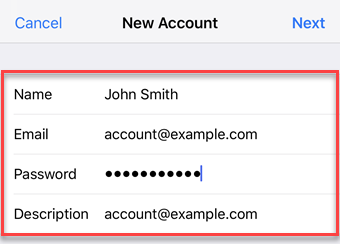
Enter your account details and tap Next.

| Field | Input |
|---|---|
| Name | The name others will see when receiving your mail. |
| Email¹ | The complete email address¹ that BazingaWeb.com provided. |
| Password¹ | The password¹ you entered when setting up the IONOS email address. |
| Description | Enter a description for your Account here. This information is only used to better differentiate your Account from one another. |
| Field | Input |
|---|---|
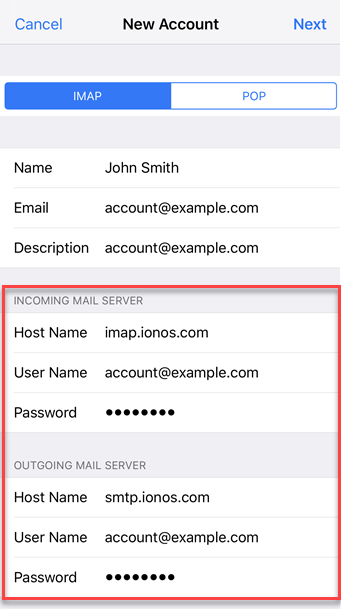
| Hostname | imap.ionos.com (recommended) or pop.ionos.com |
| Username | The full email address of your IONOS email account |
| Password | The password you entered when setting up the IONOS email address |
Although the Outgoing Server Settings are marked as Optional by default, you must enter the Outgoing Server Settings below to set up your email account correctly.
If you do not add these settings, you cannot send email.
| Field | Input |
|---|---|
| Hostname | smtp.ionos.com |
| Username | The full email address of your IONOS email account |
| Password | The password you entered when setting up the IONOS email address |
Please Note:
- The email account is automatically set up with SSL encryption. The device performs the correct configuration in the background. You no longer have to set anything manually.
- The SSL settings can also be checked later.
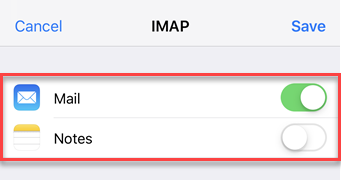
Synchronization Options
Select which data (mail, notes) you want to synchronize and confirm with Save.
Guess What, Bazinga! You are done! If you want, send us an e-mail by clicking here, and we will reply to ensure everything is working correctly!
If by chance we do not respond right away, send us a quick text to 604-813-3539 (Click here to Text Now).
If you also have a Mac Notebook or Desktop, Click here to see the instructions to set up on your Mac Notebook or Desktop.
While we suggest you use the provided Mac Apps on both your Mac Desktop/Notebook or Smartphone/Tablet, you can click here to access your e-mail from any web browser.